When you're selling a repaired salvage vehicle, your photography can make or break the sale. Buyers need to see proof that the work's been done properly, and smartphone snaps from random angles won't cut it. Professional salvage car photography tells a story - the before, the during, and the most important part, the after. You're not just showing a car. You're demonstrating competence, transparency, and quality workmanship. The difference between a vehicle that sells in three days versus three weeks often comes down to how well you've documented the repair process and presented the finished product. Repaired vehicle listing photos serve multiple purposes simultaneously. They prove the repair quality, they build buyer confidence, they justify your asking price, and they filter out time-wasters who'd question every detail in person. Get the photography right, and you'll spend less time answering sceptical questions and more time closing sales.
Why Photography Matters More for Repaired Salvage
Standard used car photography shows the vehicle's current condition. That's it. But when you're selling a repaired salvage vehicle, you're selling a transformation story. Buyers want to know what was damaged, how it was fixed, and what the end result looks like. They're inherently sceptical because they've heard horror stories about bodged repairs and corner-cutting. Your job is to overcome that scepticism through visual evidence. Three photos of the exterior from different angles might work for a clean title vehicle, but for a Cat S or Cat N that's been through repairs? You need 40-50 images minimum. Before shots showing the damage, during shots showing the repair work, and comprehensive after shots showing the finished product. Structural integrity shots become critical when you're dealing with Cat S vehicles. Buyers need to see the chassis, the subframe, the suspension mounting points. They need proof that structural repairs were done to standard, not just cosmetic patching that'll fail an MOT. Without these shots, buyers assume the worst and either don't bid or bid so low they're compensating for imagined problems.
The Three-Stage Documentation System
Break your salvage car photography into three distinct phases, each serving a specific purpose in the buyer's decision-making process.
Before Photos: Documenting the Damage
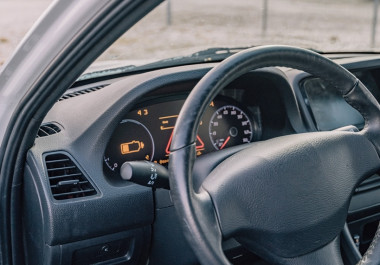
Take comprehensive photos of the vehicle in its damaged state before any repair work begins. These establish the baseline and prove you're not hiding anything. Photograph every damaged panel from multiple angles. If it's front-end collision damage, shoot from straight on, both 45-degree angles, and directly above if possible. Get close-ups of crumpled metal, broken lights, and damaged structural components. Don't worry about making it look good - you want to show exactly how bad it was. Include contextual shots that show the overall damage pattern. If the airbags deployed, photograph the dashboard and steering wheel. If there's frame damage, get underneath and photograph the affected areas. Document any fluid leaks, damaged wiring, or mechanical issues. These before shots serve two purposes. First, they prove to the buyer that you're being transparent about the vehicle's history. Second, they make the after photos more impressive by contrast. When a buyer can see that you've transformed a genuinely damaged vehicle into something roadworthy, your asking price makes sense.
During Photos: Proving the Repair Quality
This is where most sellers fail. They skip the repair process documentation entirely, which is a massive missed opportunity. During-repair shots prove competence and build trust in ways that finished photos never can. Photograph the strip-down process. Show panels removed, damaged parts identified, and the extent of the work required. If you're replacing a subframe, photograph the old one removed and the new one ready to install. Document the actual repair work. Welding being done on structural repairs, new parts being fitted, alignment being checked. These don't need to be perfectly composed shots - they're evidence of proper process. Get photos of any specialist equipment used. If the vehicle went on a jig for alignment, photograph it. If you're using genuine manufacturer parts rather than pattern parts, photograph the boxes with part numbers visible. Include photos of any certification or inspection during the process. If an engineer inspected structural repairs, photograph the inspection taking place and any certification paperwork.
After Photos: Showcasing the Finished Product
Your after shots need to be comprehensive and professional. This is where presentation matters. Take 25-30 photos minimum of the completed vehicle, covering every angle and detail. Standard exterior shots from all four corners, both sides, front, rear, and three-quarter angles. Clean the vehicle first - dirty cars photograph terribly and suggest poor attention to detail. Shoot in good natural light, avoiding harsh shadows or dim conditions. Close-ups of repaired areas. If you've replaced a quarter panel, photograph it from multiple angles showing the finish quality, paint match, and panel gaps. Buyers need to see that the repair work is invisible or near-invisible. Interior shots from every seat position. Photograph the dashboard, centre console, door cards, boot space, and any refurbished or replaced interior components. Undercarriage photography showing structural repair areas. Get underneath with good lighting and photograph the chassis, subframe, suspension mounting points, and any welded or replaced structural components. Engine bay from multiple angles. Show that it's clean, properly assembled, and that any mechanical repairs are complete.
Technical Photography Requirements
Lighting makes or breaks salvage car photography. Shoot outdoors in overcast conditions or during golden hour (early morning or late afternoon). Avoid direct midday sun which creates harsh shadows and makes it difficult to see detail. Indoor photography needs proper lighting setup - a couple of LED work lights at minimum. Don't rely on overhead fluorescent lights which create weird colour casts. Camera settings matter even on smartphones. Turn off any beauty modes or filters. You want accurate colour representation, not Instagram-ready shots. Use HDR mode if available to capture detail in both shadows and highlights. Composition basics: Hold the camera level. Nothing screams amateur like photos where the horizon is tilted 10 degrees. Get low for exterior shots - shooting from standing height makes vehicles look smaller and less impressive. For structural integrity shots, use a macro mode or get as close as your camera allows whilst maintaining focus. Buyers need to see weld quality, not blurry close-ups. Photograph VIN plates clearly. This proves the vehicle's identity and builds trust. Include the V5C document (with personal details obscured) to prove ownership and categorisation status.
Common Photography Mistakes to Avoid
Shooting in poor lighting conditions. Dark, grainy photos make buyers suspicious and suggest you're hiding something. If you can't see detail clearly in the photo, reshoot it. Photographing a dirty vehicle. Dirt, dust, and grime make even quality repairs look substandard. Spend 30 minutes cleaning before you photograph. Taking photos from random angles that don't show relevant details. Every photo should have a purpose - if it doesn't show something meaningful, don't include it. Forgetting to photograph repaired areas close-up. Buyers specifically want to see where damage was and how repairs look. Using filters or heavy editing. Colour-corrected photos that don't match reality lead to disappointed buyers and failed sales. Over-compressing images. Large, clear photos are essential for buyers who'll zoom in to examine details. Don't upload tiny 800x600 images. Failing to photograph documentation. Repair receipts, parts invoices, alignment reports, and MOT certificates are powerful trust-builders.
Creating a Repair Portfolio for Multiple Vehicles
If you're regularly repairing and selling salvage vehicles, create a portfolio system for repair process documentation. This serves multiple purposes beyond individual sales. Set up a simple organisation system. Create folders for each vehicle with subfolders for before, during, and after photos. Name files descriptively - "VIN-front-damage-before.jpg" beats "IMG_0042.jpg". Build a template shot list. Develop a standard list of angles and details you photograph for every vehicle. This ensures consistency and means you never miss critical shots. Consider creating time-lapse sequences. If you're documenting a major repair over several days, time-lapse photography of the process makes impressive marketing content. Use portfolio organization to demonstrate your overall competence. When selling your fifth or sixth repaired salvage vehicle, you can reference past successful repairs in your current listings.
Presentation Platforms and Image Quality
Where you present these photos matters. If you're listing on auction platforms, ensure images are high resolution. Many platforms compress uploads, so start with the highest quality possible. Create a dedicated photo gallery. If you have a website or use platforms that allow external links, host full-resolution images in a gallery that buyers can browse through. Consider creating a video walkthrough. A 2-3 minute video showing the vehicle from all angles, demonstrating that it drives properly, and explaining the repairs verbally can be more convincing than 50 static photos. For high-value vehicles, invest in professional photography for the final product. A proper automotive photographer with correct lighting and equipment can create showroom-quality images that justify premium pricing. Browse professionally documented examples at RAW2K to understand how comprehensive repaired vehicle listing photos establish buyer confidence through systematic visual evidence.
Photography as Proof of Competence
Your repaired vehicle listing photos aren't just pretty pictures. They're evidence. Evidence that you know what you're doing, that repairs were done properly, and that the vehicle is worth what you're asking. Buyers who see comprehensive documentation - before, during, and after - don't need to ask "but how do I know the repairs are any good?" They can see it. They can evaluate your workmanship, assess the quality, and make an informed decision. This transparency attracts serious buyers and filters out time-wasters. People who just want to lowball every listing won't bother when they can see you've done quality work. People who are looking for a properly repaired vehicle at a fair price will recognise the value. Photography also protects you from post-sale disputes. When you've documented everything thoroughly, there's no ambiguity about what condition the vehicle was in when sold. Buyers can't claim they didn't know about something when you've got 40 photos showing every detail.
Regional and Market Considerations
Different markets have different expectations for photography. If you're selling to trade buyers who'll inspect in person anyway, extensive photography might seem less critical. Wrong - trade buyers use photos to decide which vehicles are worth their time to inspect. Comprehensive photography saves everyone time. If you're selling nationally where buyers might be 200 miles away, photography becomes your primary sales tool. These buyers are making decisions based almost entirely on visual evidence. For high-value vehicles - luxury salvage, performance cars, rare models - photography standards need to be higher. These buyers expect professional presentation to match the premium pricing. For commercial vehicles like vans, focus less on glamour shots and more on practical documentation. Show the load space, show structural repairs, show that it's ready to work.
The Bottom Line on Salvage Photography
Comprehensive salvage car photography isn't optional for successful sales. It's the difference between vehicles that sit unsold for weeks and vehicles that attract serious bids within days. Document the entire repair process. Show the damage, show the repair work, show the finished product. Take more photos than you think you need - 40-50 images minimum for a properly documented repaired salvage vehicle. Focus on structural integrity shots for Cat S vehicles. Prove that repairs were done to standard, not just made to look acceptable. Invest time in proper lighting, composition, and presentation. Clean the vehicle, shoot in good conditions, and present images at high resolution. Use photography to demonstrate competence, build trust, and justify your pricing. When buyers can see quality work, they'll pay for quality work. Remember that your repair process documentation serves multiple sales. The portfolio you build with each vehicle becomes marketing material for future sales, demonstrating consistent quality and building your reputation as a competent repairer.
Master systematic repair process documentation through comprehensive structural integrity shots, then examine current salvage vehicle auctions to understand professional photography standards. Study professionally presented salvage cars for sale showing complete before-during-after documentation, review detailed photography guidance, and register to implement portfolio organization methods that demonstrate consistent repair quality across multiple successful sales.